


The warm glow of recessed lighting can add beauty, security, and functionality to your home’s exterior. Whether you’re illuminating a pathway, highlighting architectural details, or creating an inviting patio ambiance, these strategically placed lights can significantly enhance your outdoor space. While electrical work requires caution, installing recessed lighting outside your house is a manageable DIY project for those with some basic electrical knowledge and the right tools.
This guide equips you with the information and steps to confidently tackle this project.
Planning Your Outdoor Recessed Lighting
Before diving in, take some time to plan your lighting layout. Here are some key aspects to consider:
- Purpose: What do you want to achieve with your outdoor lighting? Is it for safety and security, highlighting architectural features, creating ambiance, or illuminating walkways?
- Placement: Sketch a layout of your outdoor space, marking where you want the lights installed. Consider factors like light throw (distance the light illuminates), spacing between fixtures, and the overall aesthetic you desire.
- Local Codes: Electrical regulations vary by region. Always check with your local building department to ensure your project complies with all safety codes.
- Power Source: Determine where you’ll be drawing power from. Ideally, you want a dedicated circuit for your outdoor lights controlled by a switch.
- Light Fixture Selection: Choose outdoor-rated recessed lights specifically designed for wet locations. These will have weatherproof housings and corrosion-resistant components. Consider factors like size, style, and desired light output (lumens).
- Wire Gauge: Select the appropriate wire gauge based on the distance from the power source to the farthest light fixture and the total wattage of your lighting system. Consulting a qualified electrician for wire gauge selection is recommended.
Safety First: Essential Precautions
Electrical work comes with inherent risks. Here are crucial safety measures to take before you begin:
- Turn Off the Power: Locate the circuit breaker controlling the power supply for your outdoor lighting and turn it off completely. Double-check with a voltage tester to ensure no electricity is flowing before proceeding.
- Grounding is Essential: All outdoor electrical installations require proper grounding to prevent electrical shock. Ensure your chosen light fixtures and junction boxes have built-in grounding features.
- Use GFCI Outlets: Ground Fault Circuit Interrupter (GFCI) outlets provide additional safety by automatically cutting off power in case of a ground fault. Use GFCI outlets whenever working with outdoor electrical installations.
Tools and Materials, You’ll Need:
- Drill (with appropriate drill bits for wood and masonry)
- Jigsaw (if cutting through soffit material is required)
- Hole saw (sized to match your recessed light fixture)
- Wire strippers and cutters
- Screwdriver
- Pliers
- Non-contact voltage tester
- Cable staples or straps
- Construction adhesive (optional)
- Low-voltage landscape wire (consult an electrician for the appropriate gauge)
- Outdoor-rated recessed lighting fixtures
- Junction boxes (weatherproof with built-in grounding)
- Wire nuts
- Silicone caulk
Step-by-Step Installation Guide:
- Mark and Drill Holes: Following your pre-determined layout, mark the locations for your recessed light fixtures on your soffit or eaves. Ensure proper spacing and maintain a safe distance from flammable materials. Use a drill with the appropriate bit size to create pilot holes, followed by your hole saw to create the openings for the light fixtures.
- Run Electrical Cable: From your power source (GFCI outlet), carefully run the low-voltage landscape wire through the soffit or eaves towards the light fixture locations. Maintain a safe distance from structural elements and ensure the wire is protected from pinching or damage. Use cable staples or straps to secure the wire at regular intervals.
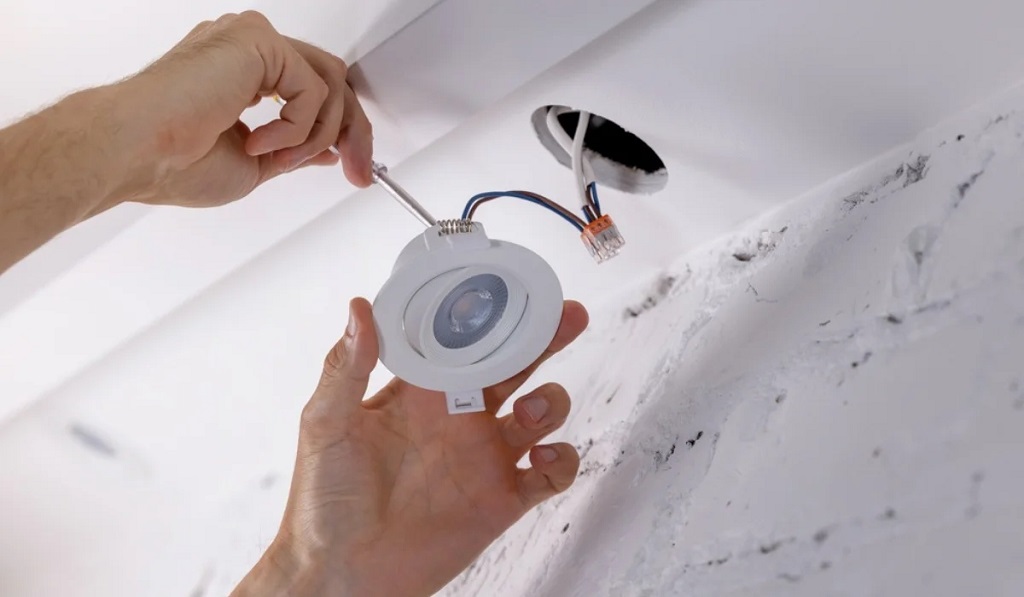
- Install Junction Boxes: At each light fixture location, position a weatherproof junction box within the drilled hole. Some recessed light fixtures come with built-in junction boxes. If not, secure the junction box using construction adhesive (if needed) and ensure proper grounding.
- Make Electrical Connections: At each junction box, carefully connect the incoming power cable and the individual wires from your recessed light fixtures using wire nuts. Ensure all connections are tight and secure. Double-check your wiring against standard electrical diagrams to confirm proper grounding and polarity.
- Install Recessed Lighting Fixtures: Carefully insert each recessed light fixture into the corresponding hole, ensuring the electrical wires are properly positioned within the junction box. Secure the light fixture using the provided mounting hardware.
- Seal and Test: Apply a generous bead of silicone caulk around the perimeter of each light fixture where it meets the soffit or eaves to create a weatherproof seal. Once the caulk cures completely, turn the power back on at the circuit breaker. Test each light fixture to ensure they function properly.
Additional Tips for Success:
- Work with a Partner: Having a helping hand for tasks like holding wires or passing tools can significantly improve safety and efficiency.
- Mind the Weather: Avoid installing outdoor lighting during rainy or excessively hot weather conditions.
- Clear Communication: If you’re unsure about any aspect of the electrical work, don’t hesitate to consult a qualified electrician for guidance.
- Label Your Circuits: Clearly label the circuit breaker controlling your outdoor lighting for future reference and safety.
Alternatives to Consider:
While recessed lighting offers a sleek and modern look, here are some alternative outdoor lighting options to consider:
- Wall-mounted fixtures: These provide targeted lighting for specific areas like doorways or patios.
- Path lights: Low-level path lights illuminate walkways and add a touch of ambiance.
- String lights: Festive and versatile, string lights can create a charming atmosphere for patios and decks.
- Solar-powered lights: A sustainable option, solar-powered lights require no electrical wiring and are perfect for highlighting specific areas.
Related: How to Make a Dark Hallway Lighter and Brighter
By following these steps and considering the valuable tips, you can enhance your home’s exterior with the inviting glow and functionality of recessed lighting. Remember, safety is paramount when dealing with electrical work. If you’re uncomfortable with any part of the process, seek professional help from a qualified electrician. Enjoy the satisfaction of a successful DIY project and the beauty of your transformed outdoor space!