
Water leaks are one of the most common household problems. They waste water, raise your bills, and can damage your walls and floors over time. The good news is that many leaks are simple to fix. You do not always need to call a plumber. With the right approach and a few basic supplies, you can handle most leaks yourself.
This guide walks you through the process step by step. You will learn how to find leaks, prepare for repairs, and seal them properly. Additionally, you will discover which leak repair tools work best for common situations. Whether you are a first-time homeowner or just looking to save money, this article has you covered.
Understanding Why Water Leaks Happen
Before you fix a leak, it helps to understand why it happened. Pipes and joints wear out over time. Temperature changes cause pipes to expand and contract. This movement can loosen fittings and create small gaps. Corrosion is another common cause. Old metal pipes rust from the inside, which weakens the walls and leads to pinhole leaks.
High water pressure is also a frequent culprit. When pressure is too high, it stresses your pipes every time you use a faucet. Over time, this stress causes joints and seals to fail. Therefore, it is worth checking your home’s water pressure if you notice recurring leaks.
Understanding the cause helps you choose the right fix. A loose fitting needs a different solution than a corroded pipe. Knowing what you are dealing with saves you time and effort.
How to Identify a Water Leak in Your Home
Some leaks are obvious. You see a drip or a puddle forming under a sink. However, many leaks stay hidden. They happen inside walls, under floors, or behind appliances. These are the leaks that cause the most damage because they go unnoticed for weeks or months.
Here are some signs that you may have a hidden leak:
- Your water bill has gone up without any change in your habits.
- You hear the sound of running water when no taps are open.
- There are damp patches or stains on your walls or ceiling.
- You notice a musty smell in certain rooms.
- Your floors feel soft or spongy in spots.
If you suspect a hidden leak, turn off all water in your home and check your water meter. If the meter still moves, water is escaping somewhere. This simple test can confirm a leak before you start searching for it.
Essential Tools You Need for Leak Repairs
Having the right supplies on hand makes any repair job easier. You do not need a professional toolkit to fix most home leaks. A basic set of leak repair tools will handle the majority of common issues. Below is a list of what you should keep in your home repair kit.
Adjustable Wrenches and Pliers
These are your most-used items. An adjustable wrench helps you tighten or loosen pipe fittings without damaging them. Slip-joint pliers are useful for gripping round surfaces like pipes and nuts. Always choose a size that fits your pipes comfortably. Using the wrong size can strip fittings and make the leak worse.
Pipe Cutters
When a section of pipe is too damaged to repair, you need to cut it out and replace it. A pipe cutter gives you a clean, straight cut every time. This is important because an uneven cut makes it harder to seal the new joint properly. Pipe cutters come in different sizes, so match the cutter to your pipe diameter.
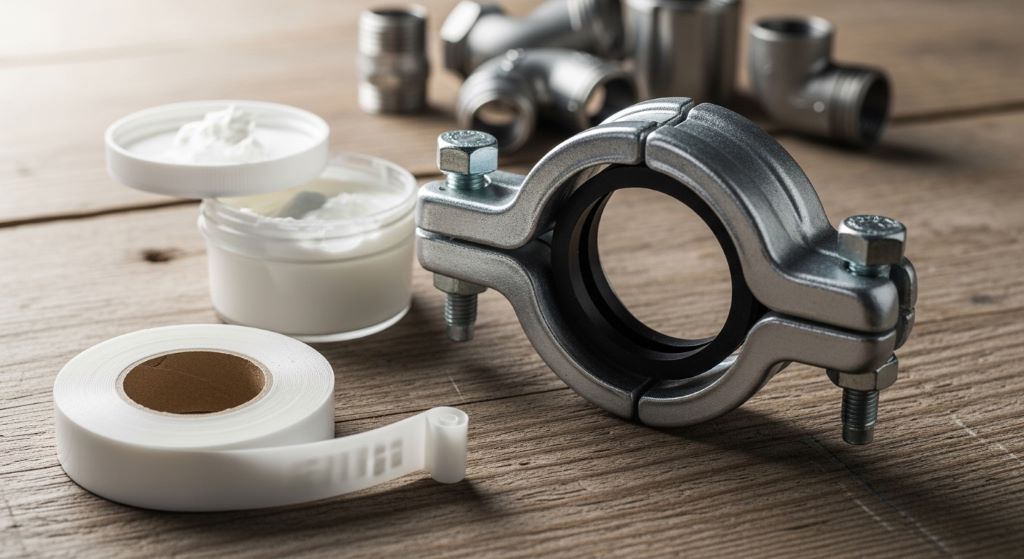
Pipe Sealing Tools and Tape
Pipe sealing tools include items like thread seal tape, pipe joint compound, and rubber patch kits. Thread seal tape, often called PTFE or Teflon tape, wraps around threaded fittings to create a watertight connection. It is inexpensive and easy to apply. Pipe joint compound, also known as pipe dope, works in a similar way but is applied with a brush. Additionally, rubber repair clamps are excellent for quick fixes on straight pipe sections.
A Basin Wrench
This long, T-shaped tool is designed to reach into tight spaces, especially under sinks. It lets you tighten or remove faucet nuts that a regular wrench cannot reach. If you have ever struggled to fix a dripping faucet because you could not get behind the basin, this tool is your solution.
Plumber’s Putty and Caulk
These two materials seal gaps around fixtures like sinks, bathtubs, and drains. Plumber’s putty stays soft and flexible after it sets, making it great for surfaces that need a little movement. Silicone caulk creates a firm, waterproof seal and works well around showers and tile edges. Use the correct one for each job to get a lasting result.
Step-by-Step Guide to Fixing Common Leaks
Now that you know your tools, it is time to put them to use. Below are instructions for fixing the most common types of leaks found in homes.
Fixing a Leaking Faucet
A dripping faucet is usually caused by a worn washer or O-ring inside the handle. First, turn off the water supply valve under the sink. Then, remove the faucet handle by unscrewing the cap and handle screw. Next, pull out the cartridge or stem and look for the rubber washer at the bottom. If it looks flat, cracked, or compressed, replace it. Reassemble everything in reverse order, then slowly turn the water back on to test.
Sealing a Leaky Pipe Joint
Leaks at pipe joints are very common. Turn off the water and dry the pipe completely. If the joint has a threaded connection, unscrew it and clean the threads. Wrap three to five layers of PTFE tape around the male threads in the direction of the thread. Screw the fitting back together firmly. However, do not overtighten, as this can crack plastic fittings. Turn the water back on and check for drips.
Patching a Pinhole Leak in a Pipe
A pinhole leak in a copper or plastic pipe can be handled with a repair clamp or epoxy putty. Turn off the water and dry the area well. For a clamp repair, center the rubber gasket over the hole and tighten the clamp screws evenly. For epoxy putty, knead the two parts together until they form a uniform color, then press it firmly over the hole. Give the putty the time it needs to cure fully before turning the water back on.
Fixing a Running Toilet
A running toilet wastes a surprising amount of water. The most common cause is a faulty flapper at the bottom of the tank. Remove the tank lid and check if the flapper sits flat against the drain opening. If it is warped or cracked, water will keep trickling through. Turn off the water supply valve behind the toilet, flush to empty the tank, and unhook the old flapper. Snap the new one into place, reconnect the chain, and restore the water supply.
Safety Tips to Follow During Any Leak Repair
Safety should always come first. Water and electricity do not mix, so always switch off nearby electrical outlets before working in wet areas. Wear rubber gloves to protect your hands from sharp pipe edges and chemical sealants. Additionally, keep a bucket and old towels nearby to catch any remaining water in the pipes.
Never work on a live water line without shutting off the supply first. Know where your main water shutoff valve is before you start any repair. This is usually located near your water meter or where the main line enters your home. In an emergency, you need to reach it fast.
If a repair feels beyond your skill level, stop and call a licensed plumber. There is no shame in asking for help. Some jobs, such as repairing a burst pipe behind a wall, truly require professional tools and experience.
When to Call a Professional Plumber
Most small leaks are well within a homeowner’s ability to fix. However, some situations require a professional. Call a plumber if you notice water damage spreading inside a wall or ceiling. This suggests a broken pipe that you cannot easily access. Similarly, if your water pressure drops sharply throughout the house, you could have a serious main line issue.
Sewer smell coming from drains is another red flag. This could mean a cracked drain pipe under your slab or in your yard. These repairs involve excavation and are best left to the professionals. Therefore, know your limits and act accordingly.
Conclusion
Fixing water leaks at home is a skill that every homeowner should have. By learning to identify leaks early, you can prevent costly damage to your property. Keeping a set of leak repair tools ready means you can act fast when a problem appears. From sealing a dripping faucet to patching a pinhole in a copper pipe, most repairs are straightforward when you follow the right steps.
Remember to always shut off the water before you start. Use the correct pipe sealing tools for each type of repair. Take your time, work carefully, and test your fix thoroughly before calling the job done. Additionally, do not hesitate to seek professional help when the situation calls for it. A well-maintained plumbing system saves you money, conserves water, and keeps your home safe for years to come.
Frequently Asked Questions
1. What is the easiest type of water leak for a beginner to fix?
A dripping faucet is the most beginner-friendly repair. It usually requires only a screwdriver and a replacement washer or O-ring. The steps are simple, the parts are cheap, and the water supply is easy to shut off locally.
2. How does thread seal tape work to stop leaks?
Thread seal tape fills the tiny gaps between threaded pipe fittings. When you wrap it around the male threads before connecting the fitting, it creates a tight, waterproof seal. It is one of the most commonly used pipe sealing tools because it is flexible, non-sticky on application, and easy for anyone to use.
3. How can I tell if a leak is coming from inside my wall?
Signs of a hidden wall leak include damp or discolored patches on the wall surface, peeling paint or wallpaper, a musty odor, and unexplained increases in your water bill. You can also check your water meter with all taps closed. If it still runs, there is likely a hidden leak somewhere in your system.
4. Can I use regular tape or glue to fix a leaking pipe?
No. Regular tape and household glue are not designed to withstand water pressure or moisture over time. They will fail quickly and may make the problem worse. Always use products made for plumbing repairs, such as PTFE tape, epoxy putty, or pipe repair clamps.
5. How often should I inspect my home’s plumbing for leaks?
It is a good idea to do a basic check every six months. Look under sinks, around toilets, near your water heater, and along any exposed pipes. Early detection prevents small issues from turning into major repairs. You should also check after any extreme temperature changes, which can stress your pipes.
Related Topics:
How to Clean a Faucet Head: A Step-by-Step Guide for Sparkling Results
Fixing a Leaky Bathroom Faucet at the Base: A Step-by-Step Guide