


Windows are vital for ventilation and aesthetics in any home, but a faulty crank mechanism can make them difficult to operate. If you’re struggling with a stiff or broken window crank, you’re not alone—many homeowners face this issue. Fortunately, replacing your window crank mechanism is a manageable task with the right knowledge and tools. For DIY enthusiasts, this process can even be a rewarding project, much like diving into a new guide from The kindle3 books collection at VisualEyesDecor. This article covers everything you need to know about replacing a window crank mechanism, from identifying issues to completing the repair.
Why Window Crank Mechanisms Fail
Window crank mechanisms, also called casement window operators, wear out over time due to regular use, exposure to weather, or poor maintenance. Rust, stripped gears, or broken internal components are common culprits. For instance, older homes may have cranks that haven’t been lubricated, causing friction and eventual failure. Additionally, harsh weather conditions like heavy rain or extreme temperatures can corrode metal parts, making the crank stiff or inoperable. Recognizing these issues early can save you time and money.
If you’re noticing difficulty turning the crank or if the window doesn’t open fully, it’s likely time for a replacement. A great resource for detailed steps is replacing your window crank mechanism, which offers a step-by-step guide to make the process straightforward. By addressing the problem promptly, you can restore your window’s functionality and avoid further damage.
Tools and Materials You’ll Need
Before starting, gather the necessary tools and materials to ensure a smooth repair process. Having everything on hand prevents delays and keeps the project stress-free. Here’s a list of what you’ll typically need:
- Flathead and Phillips screwdrivers
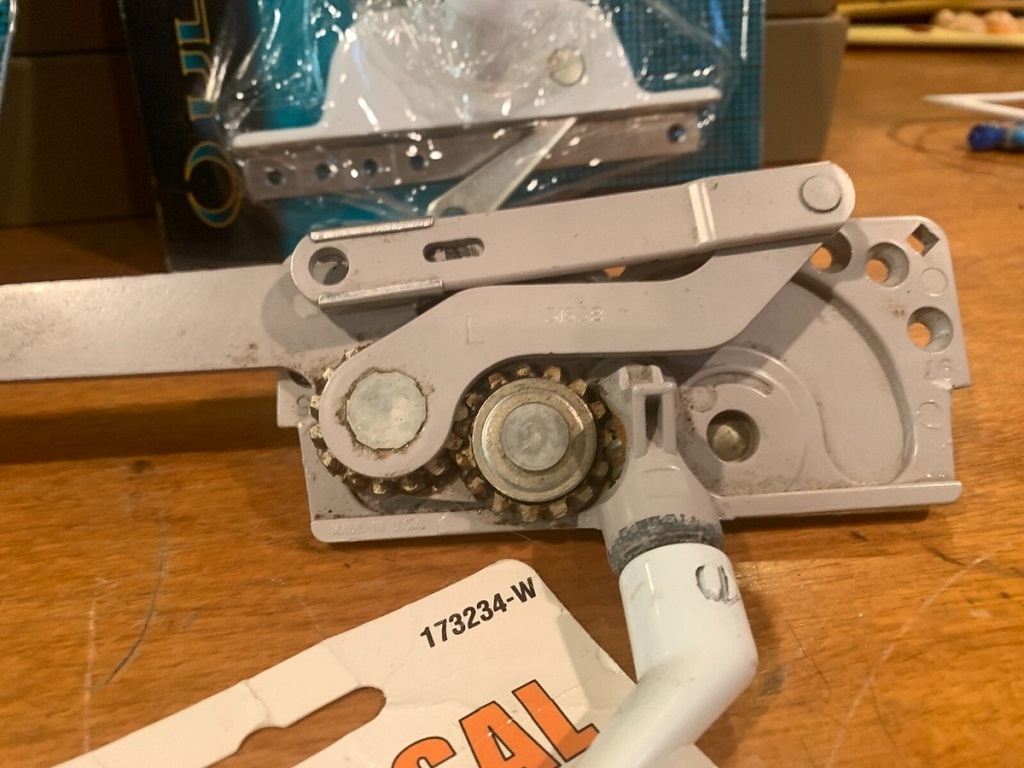
- Replacement crank mechanism (specific to your window brand)
- Pliers
- Lubricating oil or silicone spray
- Cleaning rags
- Putty knife (optional for stuck covers)
Make sure the replacement crank matches your window’s make and model. Check the manufacturer’s specifications or consult a hardware store professional to confirm compatibility. Additionally, keep safety in mind—wear gloves to protect your hands from sharp edges or rust.
Step-by-Step Guide to Replacing a Window Crank Mechanism
Replacing a window crank mechanism is a straightforward process if you follow a clear sequence. Below is a detailed guide to help you complete the task efficiently.
Step 1: Remove the Old Crank
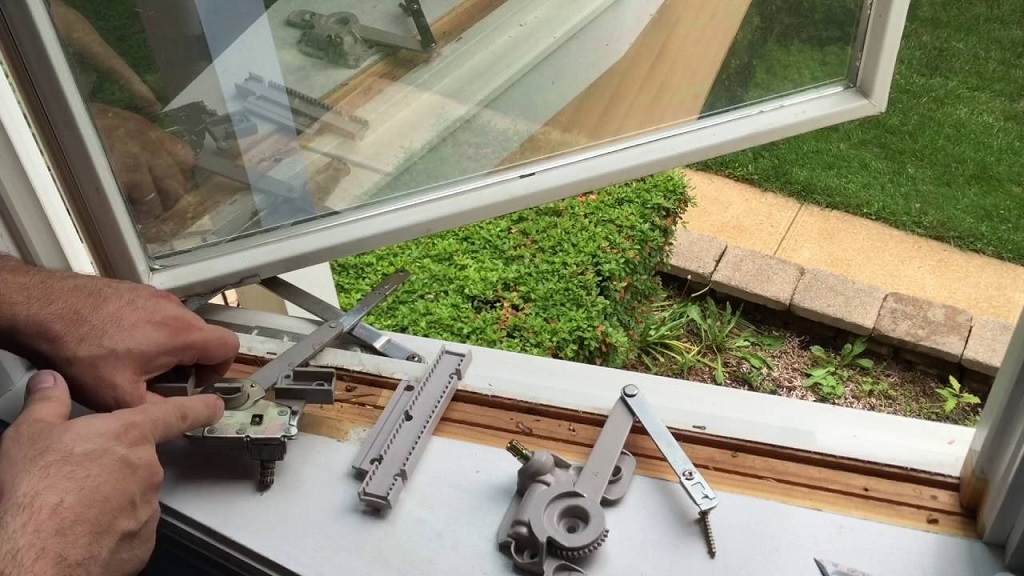
Start by opening the window fully to access the crank mechanism. Locate the screws securing the crank cover or base to the window frame. Use a screwdriver to remove these screws carefully. If the cover is stuck, gently pry it off with a putty knife. Next, detach the crank arm from the window track, which may require loosening additional screws or clips. Keep all screws in a safe place for reinstallation.
Step 2: Inspect and Clean the Area
Once the crank is removed, inspect the window frame and track for dirt, rust, or debris. Clean the area with a rag and, if needed, apply a mild cleaner to remove grime. A clean surface ensures the new mechanism operates smoothly. If you notice significant rust or damage, consider addressing these issues before installing the new crank to prevent future problems.
Step 3: Install the New Crank Mechanism
Position the new crank mechanism in the same spot as the old one. Align the screw holes and secure the base with the original or provided screws. Attach the crank arm to the window track, ensuring it moves freely without binding. Test the crank by turning it to open and close the window. If it feels stiff, double-check the alignment or apply a small amount of lubricating oil to the gears.
Step 4: Test and Adjust
After installation, test the window several times to confirm smooth operation. If the crank feels loose or overly tight, adjust the screws or arm alignment. Proper adjustment ensures long-term durability and ease of use. Once satisfied, replace any decorative covers or trim to complete the repair.
Common Mistakes to Avoid
While replacing a window crank mechanism is relatively simple, certain mistakes can complicate the process. First, avoid using an incompatible crank, as this can damage the window or lead to poor performance. Always verify the model number before purchasing. Second, don’t overtighten screws, as this can strip the threads or crack the frame. Finally, neglecting to clean the window track can cause the new mechanism to wear out prematurely. Taking your time and double-checking each step can prevent these issues.
When to Call a Professional
Although many homeowners can handle this repair, some situations call for professional help. If the window frame is damaged, the mechanism is part of a complex system, or you’re unsure about compatibility, a professional can ensure a proper fix. Moreover, older windows with unique designs may require specialized parts that are hard to source. In these cases, hiring an expert saves time and prevents costly mistakes. However, for most standard casement windows, a DIY approach is sufficient with the right guidance.
Benefits of Replacing Your Window Crank Mechanism
A functional window crank improves your home’s comfort and energy efficiency. A smooth-operating window allows for better ventilation, reducing reliance on air conditioning. Additionally, a new crank enhances your home’s appearance by eliminating unsightly, worn-out hardware. From a practical standpoint, addressing a faulty crank prevents further damage to the window frame or glass, saving you from more expensive repairs down the line. Overall, this small project can make a big difference in your home’s functionality and appeal.
Maintaining Your New Crank Mechanism
To extend the life of your new crank mechanism, regular maintenance is key. Lubricate the gears annually with silicone spray or oil to prevent friction. Clean the window track regularly to remove dirt and debris that could affect performance. Additionally, inspect the crank for signs of wear, especially after extreme weather. Simple upkeep ensures your window operates smoothly for years to come.
Read More Also: Bedroom Bliss: A Step-by-Step Guide to Setting Up Your Dream Sleep Sanctuary
Frequently Asked Questions
1. How do I know if my window crank mechanism needs replacing?
If the crank is hard to turn, makes grinding noises, or doesn’t open the window fully, it likely needs replacement. Inspect for rust or broken parts to confirm.
2. Can I replace a window crank mechanism without professional help?
Yes, most homeowners can replace a crank mechanism with basic tools and a compatible part. Follow a reliable guide and take your time to ensure success.
3. How long does it take to replace a window crank mechanism?
The process typically takes 30–60 minutes, depending on your experience and the window’s condition. Gathering tools and parts beforehand speeds things up.
4. Where can I find the right replacement crank for my window?
Check with the window manufacturer, hardware stores, or online retailers. Ensure the part matches your window’s brand and model for compatibility.
5. What should I do if the new crank doesn’t work smoothly?
Double-check the installation for proper alignment and secure screws. Lubricate the gears and clean the track. If issues persist, consult a professional.
Read More Also: Sleep Haven Makeover: Elevate Your Bedroom Aesthetic!
Conclusion
Replacing a window crank mechanism is a practical DIY project that restores your window’s functionality and enhances your home’s comfort. By understanding the causes of crank failure, gathering the right tools, and following a clear process, you can tackle this repair with confidence. Regular maintenance and attention to detail ensure your new crank lasts for years. Whether you’re a seasoned DIYer or a beginner, this guide provides the knowledge to succeed. For more home improvement tips, explore resources like those at VisualEyesDecor to keep your home in top shape.