

Reframing a door is a practical home improvement project that can enhance your home’s functionality, energy efficiency, and aesthetic appeal. Whether your door frame is damaged, misaligned, or simply outdated, learning how to reframe a door can save you money on professional labor and give you the satisfaction of a DIY win. This comprehensive guide walks you through the process, from preparation to finishing touches, ensuring a sturdy and professional result. Let’s dive into the steps, tools, and tips you need to successfully reframe a door!
Why Reframe a Door?
Before we get started, understanding why you might need to reframe a door is key. Common reasons include:
- Structural Damage: Warping, cracking, or rot from moisture or wear.
- Misalignment: A frame that’s no longer square, causing the door to stick or not close properly.
- Upgrades: Replacing an old frame for a new door style or improved insulation.
- Energy Efficiency: Fixing gaps to prevent drafts and reduce energy bills.
Reframing a door typically involves removing the old frame, preparing the rough opening, and installing a new frame. With the right tools and patience, it’s a manageable project for most DIY enthusiasts.
Tools and Materials You’ll Need
Gathering the right tools and materials upfront ensures a smooth process. Here’s what you’ll need:
Tools
- Pry Bar: For removing the old frame and trim.
- Hammer: To remove nails and tap shims into place.
- Circular Saw or Reciprocating Saw: For cutting the old frame or adjusting new pieces.
- Level: To ensure the frame is plumb and square.
- Measuring Tape: For precise measurements of the rough opening and new frame.
- Drill and Drill Bits: For securing screws and pre-drilling holes.
- Screwdriver: To tighten screws.
- Utility Knife: For trimming excess shims or scoring old caulk.
- Carpenter’s Square: To check for squareness.
- Safety Gear: Gloves, safety glasses, and a dust mask.
Materials
- Pre-Cut Door Frame Kit or Lumber: Typically 2x4s or 2x6s, depending on wall thickness.
- Shims: Wooden or composite wedges to level and plumb the frame.
- Wood Screws: 2.5- to 3-inch screws for securing the frame.
- Nails: 16d finishing nails for additional support.
- Caulk: Exterior-grade for sealing gaps.
- Insulation: Foam or fiberglass to fill gaps for energy efficiency.
- Wood Filler: To patch small imperfections.
- Paint or Stain: To finish and protect the frame.
Step-by-Step Guide to Reframing a Door
Follow these steps to reframe your door like a pro. Take your time, measure twice, and prioritize safety.
1: Prepare the Area
- Remove the Door: Unscrew the hinges and lift the door off the frame. Store it safely.
- Clear the Trim: Use a pry bar and utility knife to carefully remove interior and exterior trim (casing) around the frame. Score any caulk or paint to avoid damaging the wall.
- Protect Your Space: Lay down a drop cloth to catch debris. Wear safety glasses and a dust mask.
2: Remove the Old Door Frame
- Locate Fasteners: Look for nails or screws holding the frame to the wall studs.
- Cut and Pry: Use a reciprocating saw to cut through nails or screws between the frame and studs. Carefully pry the old frame out with a pry bar, starting at the bottom and working up.
- Clean the Rough Opening: Remove any remaining nails, debris, or old caulk. Check the rough opening (the space in the wall) for damage or rot. Repair with new lumber if needed.
3: Measure the Rough Opening
- Measure Dimensions: Use a measuring tape to record the width (at the top, middle, and bottom) and height (both sides) of the rough opening.
- Check for Square: Use a carpenter’s square and level to ensure the opening is square and plumb. Note any discrepancies.
- Account for the New Frame: The new frame should fit snugly. Standard rough openings are slightly larger than the door—typically 2 inches wider and 2.5 inches taller than the door slab (e.g., for a 36-inch-wide door, the opening is about 38 inches wide).
4: Cut and Assemble the New Frame
- Choose Your Frame: Buy a pre-cut door frame kit or cut 2×4 or 2×6 lumber to size. You’ll need:
- Jambs: Two side pieces (height of rough opening) and a head jamb (width of rough opening).
- Cut to Size: Use a circular saw to cut the side jambs and head jamb. For a standard 80-inch-high door, cut side jambs to 81 inches to allow for the head jamb and a small gap at the bottom.
- Dry Fit: Assemble the frame loosely and place it in the opening. Check fit with a level and square. Trim if needed.
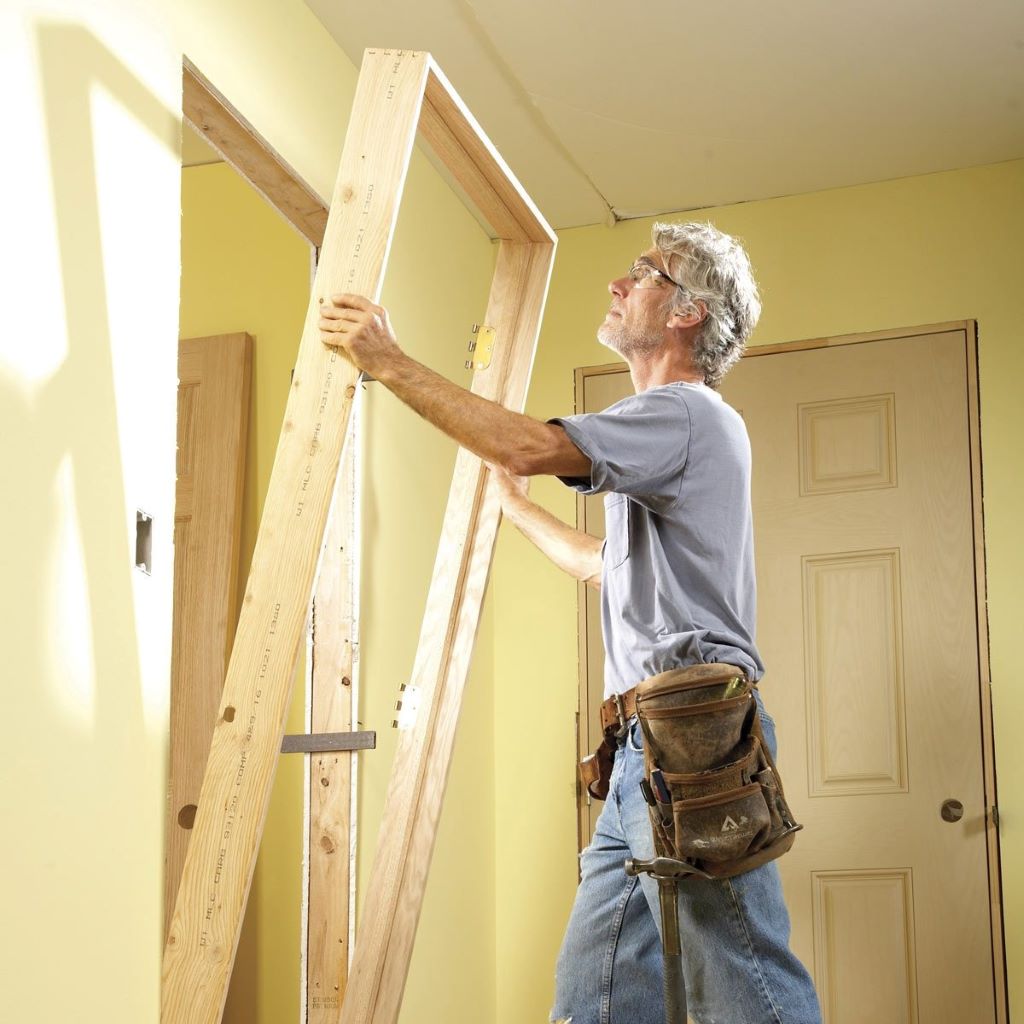
5: Install the New Door Frame
- Position the Frame: Place the assembled frame into the rough opening. Start with the hinge-side jamb.
- Level and Plumb: Use a level to ensure the hinge-side jamb is plumb (vertically straight). Insert shims between the jamb and studs to adjust, checking both side-to-side and front-to-back.
- Secure the Frame: Drill pilot holes and drive 3-inch screws or 16d nails through the jamb and shims into the studs. Start at the hinge side, then secure the top (head jamb) and latch side.
- Check Squareness: Use a carpenter’s square to confirm 90-degree angles at corners. Adjust with shims as needed.
- Test the Door: Hang the door on its hinges temporarily to ensure it swings smoothly and closes without gaps. Adjust shims if necessary.

6: Insulate and Seal
- Fill Gaps: Insert foam or fiberglass insulation into gaps between the frame and studs for energy efficiency. Avoid overstuffing, which can bow the frame.
- Trim Shims: Use a utility knife to cut off excess shim ends flush with the frame.
- Apply Caulk: Run a bead of exterior-grade caulk along the exterior edge where the frame meets the wall to prevent drafts and water infiltration.
7: Finish the Frame
- Reattach Trim: Nail or screw the interior and exterior trim (casing) back in place to cover gaps and give a polished look.
- Fill and Sand: Use wood filler to patch screw or nail holes. Sand smooth with 120-grit sandpaper.
- Paint or Stain: Apply a primer, then paint or stain to match your home’s style. Use exterior-grade products for outdoor exposure.
Tips for Success
- Measure Twice, Cut Once: Precision is critical to avoid a misfit frame.
- Work with a Partner: An extra set of hands helps hold the frame and door during installation.
- Check Local Codes: Some areas require specific frame sizes or materials for safety and energy standards.
- Consider Pre-Hung Doors: If replacing both door and frame, a pre-hung door (door and frame pre-assembled) can simplify the process.
Common Mistakes to Avoid
- Skipping the Level: An unlevel frame causes sticking or poor sealing.
- Over-Tightening Screws: This can warp the frame—tighten just enough to secure.
- Ignoring Weatherproofing: Without proper caulk and insulation, drafts and water damage can occur.
When to Call a Professional
If the rough opening is severely damaged, the wall is load-bearing, or you’re uncomfortable with power tools, consider hiring a contractor. Complex structural repairs or exterior doors in harsh climates may also benefit from expert attention.
Conclusion
Reframing a door is a rewarding DIY project that boosts your home’s functionality and curb appeal. With the right tools, careful measurements, and attention to detail, you can achieve a professional-quality result. Follow this step-by-step guide to remove the old frame, install a new one, and finish it beautifully. Ready to get started? Grab your tools and transform your doorway today!
Read More:
The Best Doors to Install in Your Home