


A gable roof porch instantly transforms the curb appeal of any home. Homeowners love the classic triangular roofline that sheds rain and snow beautifully while adding usable outdoor living space. In fact, according to the U.S. Census Bureau’s 2024 Construction Report, porch additions remain among the top five most popular exterior remodeling projects nationwide. Moreover, the National Association of Home Builders reports that 65% of new single-family homes now include a front porch—proof that this timeless feature never goes out of style. This comprehensive guide walks you through every stage of constructing a sturdy, code-compliant gable roof porch complete with ready-to-use building plans.
Why Choose a Gable Roof Porch Design?
Gable roofs stand out for several practical reasons. First, the steep pitch directs water away quickly. Second, the open gable ends improve ventilation. Third, the design accommodates larger overhangs that protect doors and windows. Additionally, builders favor gable porch roofs because they tie seamlessly into existing house rooflines. Homeowners enjoy the architectural interest the two sloping planes create. Finally, the structure supports heavy snow loads better than flat or shed styles in colder climates.
Planning Your Gable Roof Porch Addition
Successful projects begin long before the first nail. Start by measuring the available space in front of your entry door. Most building codes require at least 6–8 feet of depth for comfortable seating. Next, decide the width. A 10–16 foot span works well for average homes, while larger houses can handle 20 feet or more. Consider how the new porch roof will intersect with your existing roof. Sketch several layouts on graph paper or use free online design tools.
Local Building Codes and Permits You Must Follow
Every municipality enforces specific rules. Contact your local building department early. They typically require detailed porch construction plans showing footing depths, lumber sizes, and connection details. Furthermore, frost-line depth determines how deep concrete piers must go—often 36–48 inches in northern states. Homeowners who skip permits risk costly tear-down orders later.
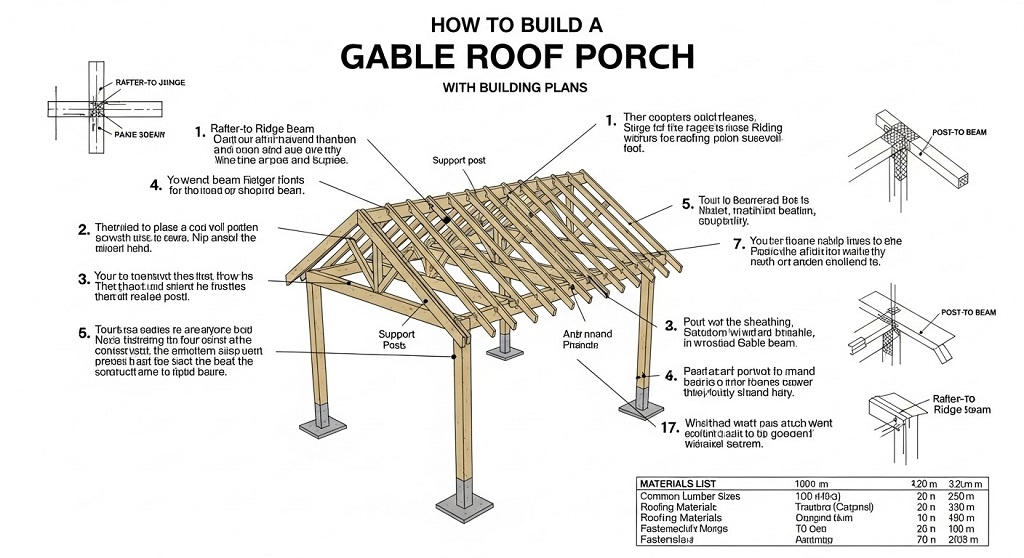
Essential Materials for a Lasting Porch Roof
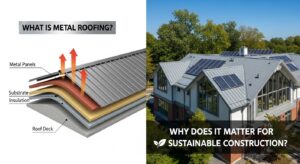
Quality materials ensure decades of service. Pressure-treated southern yellow pine remains the top choice for structural framing. Use galvanized or stainless-steel fasteners to prevent rust stains. For roofing, architectural asphalt shingles match most homes and carry 30–50 year lifespans. Metal roofing offers superior durability in coastal or high-wind areas. Moreover, composite or PVC trim boards eliminate painting forever.
Recommended Lumber Sizes (Common 12×12 Foot Porch Example)
- Ledger board: 2×10 or 2×12 pressure-treated
- Posts: 6×6 pressure-treated
- Beams: Double 2×12 or engineered LVL
- Rafters: 2×8 at 16 inches on-center (for 5/12–7/12 pitch)
- Roof sheathing: ⅝-inch CDX plywood or OSB
- Fascia: 2×6 or 1×8 PVC
Step-by-Step: How to Build the Gable Roof Porch
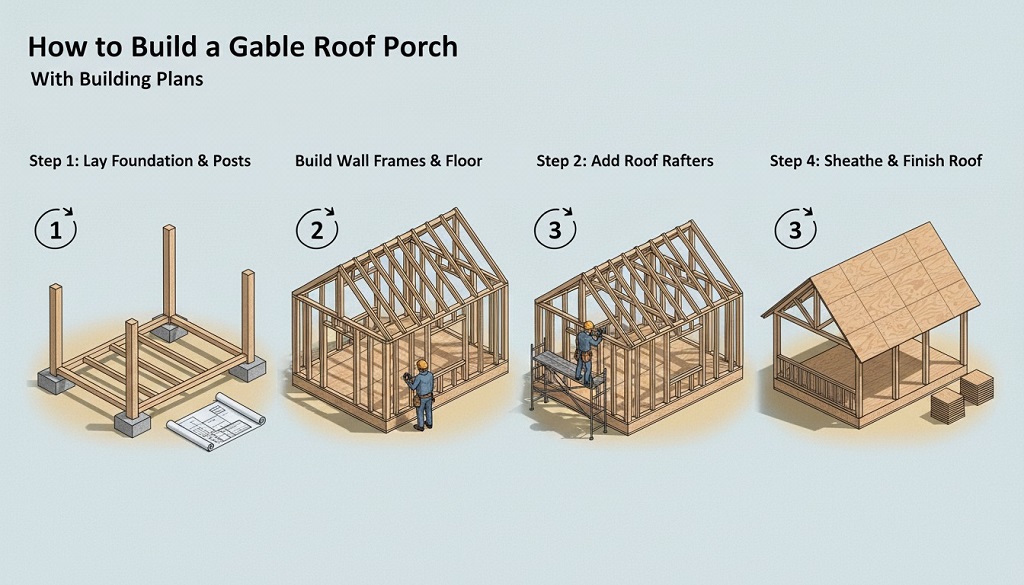
1. Prepare the Foundation and Footings
Mark the corners with batter boards and string lines. Dig holes below frost line and pour concrete piers with sonotube forms. Install post-base hardware while concrete remains wet. Allow 48–72 hours curing time before loading.
2. Install the Ledger Board Against the House
Lag-screw a pressure-treated ledger directly to the rim joist or band board. Flash properly with Z-flashing and peel-and-stick membrane. This critical step transfers roof load into the house framing.
3. Set the Posts and Build the Beam
Plumb and brace 6×6 posts on the pier brackets. Cut posts to exact height so the beam creates the desired roof pitch. Sandwich two 2×12 beams around the posts and bolt together every 24 inches.
4. Frame the Floor System
Install rim joists and floor joists at 16 inches on-center. Cover with ¾-inch tongue-and-groove plywood subfloor. Add blocking between joists for future decking attachment.
5. Raise the Gable End Walls
Build two triangular gable end frames on the ground. Use 2×6 lumber for king posts and common rafters. Stand them up, toenail to the beam, and brace temporarily.
6. Install Lookout Rafters and Fly Rafters
Lookouts run horizontally from the house wall to support overhangs. Fly rafters extend past the gable ends to form decorative overhangs. Maintain consistent 24-inch spacing.
7. Hang the Common Rafters
Cut the bird’s-mouth notch so rafters sit flush on the beam. Use hurricane ties at every connection. Install collar ties every fourth pair to prevent roof spread.
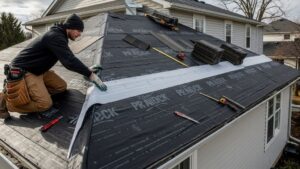
8. Sheathe the Roof and Install Underlayment
Nail ⅝-inch sheathing with 8d ring-shank nails in a staggered pattern. Cover immediately with #30 felt or synthetic underlayment. Add ice-and-water shield in valleys and eaves.
9. Shingle the Roof and Flash Properly
Start with starter strips and work upward. Overlap each course correctly. Flash the wall intersection with step flashing and counterflashing. Cap the ridge with vented ridge cap shingles.
10. Add Soffit, Fascia, and Gutters
Box in the eaves with vented soffit panels. Install fascia boards and aluminum drip edge. Hang seamless gutters with downspouts directed away from the foundation.
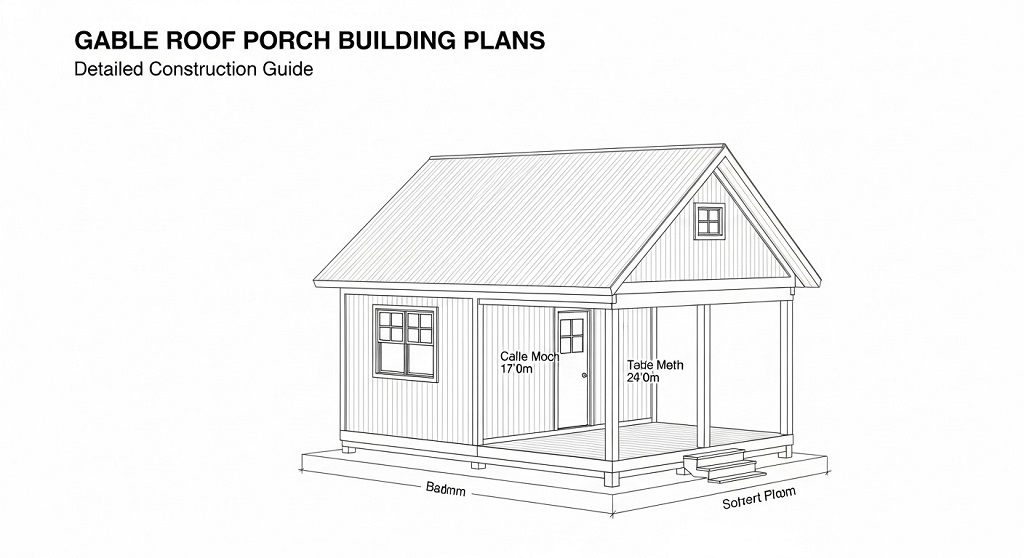
Free Downloadable Gable Roof Porch Building Plans
Many homeowners search for ready-made plans to speed up permitting. Reputable sources offer detailed PDF blueprints for common sizes (8×10, 10×12, 12×16, etc.). These plans include footing schedules, material lists, cutting diagrams, and 3D renderings. Always verify that downloaded plans meet your local code amendments before construction.
Common Pitch Options and Snow Load Considerations
A 6/12 pitch strikes the perfect balance between aesthetics and performance in most regions. Shallower 4/12 pitches work in mild climates but shed snow slowly. Steeper 8/12–12/12 pitches create dramatic cathedral-like ceilings underneath. Furthermore, engineers rate rafter spans based on snow load zones. A typical 2×8 rafter at 16 inches on-center safely spans 14–16 feet under 30 psf live load.
Finishing Touches That Elevate Your Porch
Paint or stain posts and beams before final assembly for cleaner results. Install maintenance-free vinyl or composite decking for the floor. Add cedar or pine tongue-and-groove ceiling underneath the rafters. Moreover, incorporate electrical outlets and ceiling fans during framing for easy future upgrades. Landscape lighting along steps boosts both safety and beauty.
Safety Tips Every DIY Builder Must Know
Always wear proper PPE—hard hats, safety glasses, and gloves. Use stable scaffolding or pump jacks instead of ladders for roof work. Keep the site clean to prevent trips. Additionally, never work alone when lifting heavy beams or raising gable frames. Check weather forecasts and avoid windy days for overhead work.
Related Topics: How to remove bad smell from room
Conclusion
Building a gable roof porch rewards homeowners with increased living space, higher resale value, and timeless curb appeal. By following proper foundation techniques, accurate framing methods, and thorough waterproofing details, you create a structure that lasts generations. Now grab your tape measure, download those plans, and start transforming your front entrance today. Your perfect porch awaits—start building this weekend!
Related Topics: Outdoor Space with These DIY Balcony Bar Ideas
FAQs
How long does it take to build a gable roof porch?
Experienced DIY crews finish a 12×12 porch in 2–3 weekends. First-time builders typically need 4–6 weeks working part-time.
Do I need an architect for porch plans?
Simple attached porches under 200 square feet rarely require an architect’s stamp. However, spans over 16 feet or second-story additions usually do.
Can I build a gable porch over an existing concrete stoop?
Yes, many homeowners successfully tie new framing into existing stoops. Core-drill and epoxy dowels into the concrete for secure connections.
What is the best roof pitch for a gable porch?
A 6/12 pitch offers excellent water shedding while maintaining reasonable headroom and material efficiency in most climates.
How far can a gable roof porch extend without center posts?
Using engineered beams or properly sized built-up beams, clear spans of 14–18 feet remain common and code-approved in moderate climates.
References
- U.S. Census Bureau – Characteristics of New Housing 2024: https://www.census.gov/construction/chars/pdf/c25ann2024.pdf
- International Residential Code (IRC) 2021 – Chapter 5 Floors & Chapter 8 Roof-Ceiling Construction
- American Wood Council – Span Tables for Joists and Rafters: https://www.awc.org/codes-standards/spantables
- Fine Homebuilding – Porch Building Guide Archives