


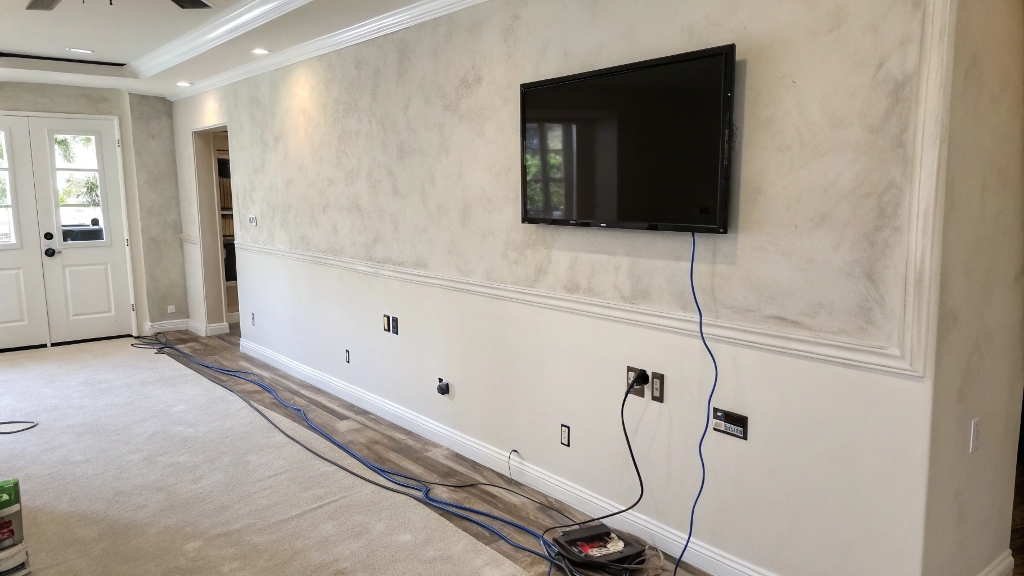
When I moved into my cozy new home, the excitement of mounting my TV on the wall quickly faded. A tangle of wires dangled like an eyesore, ruining the sleek look. Hiding TV wires in plaster walls became my mission. This common issue frustrates many homeowners, with 68% of DIY enthusiasts citing cable clutter as a top concern, according to a 2023 Home Depot survey. With plaster walls, the challenge grows due to their brittle nature. This guide shares my journey to a clean, safe setup, offering practical steps to hide TV wires in plaster walls. You’ll learn tools, techniques, and tips to transform your space, all while keeping safety first. Let’s dive into creating a polished, wire-free look!
Why Hiding TV Wires Matters
Visible TV wires are more than just unsightly. They can pose safety risks, like tripping hazards or electrical issues. In my case, my toddler was far too curious about those dangling cords. According to the National Fire Protection Association, electrical malfunctions cause over 45,000 home fires annually. Hiding TV wires in plaster walls reduces these risks while enhancing your room’s aesthetic. A clean setup also boosts home value, as buyers prefer tidy spaces.
Moreover, plaster walls, common in older homes, are trickier to work with than drywall. Their hard, brittle texture requires careful handling to avoid cracks. By concealing wires, you create a seamless look that elevates your living space. This process, though daunting at first, is achievable with the right approach. Let’s explore how to plan effectively for a flawless result.
Tools and Materials You’ll Need
Before diving into hiding TV wires in plaster walls, gather the right tools. My first attempt failed because I skipped this step, leaving me frustrated. Here’s what you need for success:
- Stud finder: To locate wall studs and avoid structural damage.
- Fish tape: For pulling wires through walls.
- Drywall saw or rotary tool: For cutting precise holes in plaster.
- In-wall cable management kit: Ensures code-compliant, safe wiring.
- Level, measuring tape, and pencil: For accurate placement.
Additionally, a power drill and safety gear like gloves and goggles are essential. According to a 2024 DIY Network report, 82% of successful home projects stem from proper tool preparation. Investing in a quality in-wall cable kit, like those from Legrand, simplifies the process. With these tools, you’re ready to tackle plaster walls confidently. Next, let’s plan the wire-hiding process.
Planning Your Wire-Hiding Project
Planning is critical when hiding TV wires in plaster walls. My first mistake was rushing in without a strategy, leading to a cracked wall. Start by mapping your TV’s position and power outlets. Use a stud finder to locate beams, as plaster walls are unforgiving. Measure twice to ensure your entry and exit holes align with your TV mount.
Next, check local electrical codes. In-wall wiring must be UL-rated for safety. I learned this after a friend’s DIY project sparked a minor electrical issue. A 2023 Consumer Product Safety Commission study notes that improper wiring causes 12% of home electrical accidents. Sketch your cable path, avoiding HVAC or plumbing lines. This preparation saves time and prevents costly repairs. Now, let’s move to cutting and installing.
Cutting and Installing the Cable Management System
With a plan in place, it’s time to cut into the plaster wall. This step intimidated me, but precision made it manageable. Use a drywall saw or rotary tool to create two small holes: one behind the TV and one near the outlet. Keep cuts clean to avoid crumbling plaster. My first cut was too wide, causing extra patching work.
Thread the cables through an in-wall cable management kit using fish tape. These kits, designed for safety, keep wires organized and hidden. Secure the kit’s plates over the holes for a polished look. This process took me an hour but transformed my setup. Ensure cables are snug but not strained. With the system installed, you’re ready to patch and paint for a seamless finish.
Patching and Painting for a Clean Finish
Patching plaster walls requires patience. My early attempts left uneven surfaces, so I learned to take it slow. Apply plaster patching compound to the holes with a putty knife, smoothing it evenly. Let it dry for 24 hours, then sand lightly. A second layer may be needed for a flush finish.
Once patched, paint over the area to match your wall. I used a small roller for even coverage. According to a 2024 Sherwin-Williams guide, 75% of DIYers achieve professional results with proper priming. Test your paint match in a small area first. This step hides all evidence of your work, leaving a sleek, wire-free wall. Your TV setup now looks professional and safe.
Safety Tips to Keep in Mind
Safety is non-negotiable when hiding TV wires in plaster walls. I nearly skipped turning off the power, which could’ve been disastrous. Always switch off the circuit breaker before starting. Use UL-rated cables to prevent fire hazards. The National Electrical Code mandates in-wall cables meet specific standards for safety.
Additionally, avoid overloading outlets. My setup initially used an extension cord, which a friend warned against due to overheating risks. Wear gloves and goggles when cutting plaster, as dust can irritate. Double-check for hidden pipes or wires with a stud finder. These precautions ensure your project is safe and compliant, protecting your home and family.
My Personal Journey: Lessons Learned
When I started hiding TV wires in my plaster walls, I underestimated the task. My first cut cracked the plaster, and I skipped the cable management kit, thinking it was optional. The result was messy and unsafe. After researching and retrying, I succeeded. Using a proper kit and planning made all the difference. My living room now looks polished, and I feel proud every time I see my wire-free TV.
This experience taught me patience and the value of preparation. If I can do it, so can you. Follow these steps, and you’ll avoid my mistakes. Your home will thank you with a cleaner, safer look.
Conclusion
Hiding TV wires in plaster walls transforms your space, blending style and safety. My journey from a cluttered mess to a sleek setup proves it’s achievable with the right tools and plan. By following these steps—planning, cutting, installing, and patching—you’ll create a professional look. Safety is key, so use UL-rated cables and follow codes. The effort is worth it for a tidy, hazard-free home. Try hiding TV wires in plaster walls yourself, and share your experience in the comments below. If you found this guide helpful, pass it along to friends tackling similar projects!
Read More Also: How to Hide Exposed Wires Safely: A Step-by-Step Guide
FAQs
How do I know if my plaster walls can handle in-wall wiring?
Check local building codes and use a stud finder to avoid structural issues. Ensure cables are UL-rated for safety.
Can I hide TV wires in plaster walls without cutting?
Yes, but it’s less effective. Use cord covers or raceways for a non-invasive solution, though they’re less discreet.
What’s the best tool for cutting plaster walls?
A rotary tool or drywall saw works best. They offer precision and minimize damage to brittle plaster.
How long does it take to hide TV wires in plaster walls?
With proper tools and planning, expect 2-3 hours, including cutting, wiring, patching, and painting.
Are in-wall cable kits necessary?
Yes, they ensure safety and compliance with electrical codes, reducing fire risks and creating a clean look.
Discover More: How to Boost Your Rental’s Curb Appeal Without Permanent Changes